
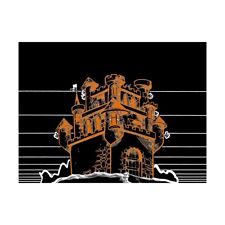
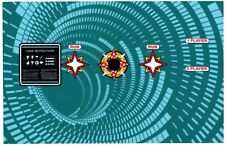
Mr Do’s Castle Control Panel Overlay CPO Textured Polycarbonate For Sale

When you click on links to various merchants on this site and make a purchase, this can result in this site earning a commission. Affiliate programs and affiliations include, but are not limited to, the eBay Partner Network.

Mr Do’s Castle Control Panel Overlay CPO Textured Polycarbonate:
$55.00
Included
CPO: Fits dedicated cabinet. All printed with Eco-solvent ink on premium 3 mil air release adhesive backed vinyl and laminated with Textured Polycarbonate
Please leave us a message for custom sizes or dimensions of kits.
Please check out our store for individual pieces of this kit.
ORDERING:
Please contact us if you would like alternate sizes and colors. We insure all dimensions are accurate as listed in our descriptions and photos. Make sure to measure your substrate for placement before ordering.
Note: Settings on monitors, devices etc can vary from one to another and colors and sample pictures shown on our products are representative of the actual colors we use.
MATERIALS NEEDED
Small cutting knife or razor blade (an Exacto Knife is ideal for the job)
Masking tape
Lint free dry cloth
SURFACE PREP
Warning: Do not use any aromatic solvents such as acetone, M.E.K., toluene, paint thinner, lacquer thinner, gasoline or ammonia-based cleaners to clean the surface area.
Saturate a clean cloth with isopropyl alcohol and wipe the surface where the vinyl is to be applied to remove any contaminates such as silicone, wax, or adhesives. Thoroughly dry the surface area with a lint free dry cloth.
Temperatures of 50º to 90º F, with 70° to 80°F being the optimum range make sure surface area is not too hot or cold prior to applying.
APPLICATION
Step 1: Leaving the release liner on , position the vinyl on the substrate, taking care to measure and align it properly.
Step 2: When it’s positioned correctly, apply a hinge using Main Blue painter’s tape or something similar, to affix the graphic in place (from the center).
Your hinge should secure the vinyl and liner to the substrate.
Step 3: With the masked vinyl print secured, lift one side of the vinyl away from the substrate and remove the release liner.
Peel the masked vinyl and lay it back down on the other half of the graphic.
Step 4: Using scissors, a utility or exact o knife, cut away the exposed half of the release liner.
Take a moment to make sure you still have a clean dry surface. Bits of dust or release liner fragments left behind can cause ‘bubbles” under your print.
Step 5: Raise the half with exposed adhesive and carefully lay it down on the surface, working with your squeegee to get a smooth, bubble and wrinkle-free application.
Work from the center hinge outward.
Step 6: Then lift the other half, remove the remaining release liner and repeat the process.
When both sides are secured, finish burnishing and then remove the application tape at 45 degree angle.
Allow some time for the adhesive bond to form. And you are finished.
PAYMENT
We accept payment by payments.
Immediate payment is required.
SHIPPING
We only ship to confirmed addresses
Please make sure you provide the correct address we will not refund for incorrect address at the time of purchase
Please contact us for international shipping
RETURNS
No-Returns
We do not accept returns on international orders
Our customer support team is available through messages only
Related Items:
Mr Do’s Castle Control Panel Overlay CPO Textured Polycarbonate
$55.00
Mr Do’s Wild Ride Control Panel Overlay CPO Textured Polycarbonate
$45.00
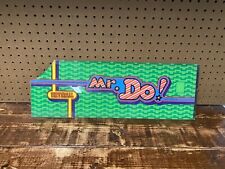
Vintage Original Arcade Mr Do's Universal Marquee Sign Video Game 1982
$34.99